Dave and I just got back from our local Bee Club Annual Picnic and am so excited about everything that I’ve learned, that I want to get it all down before I forget. I had many great conversations with other beekeepers there as well as attended the many presentations by different club members. Here are some of the things that I learned.
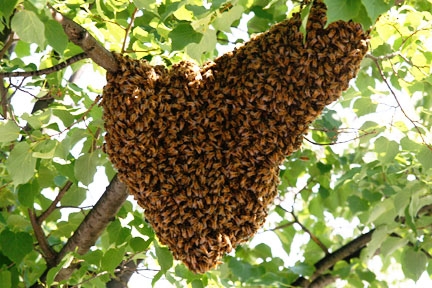
Bee swarm in tree – picture from nwibeekeepers.com
Different tactics on swarming: We have been following common beekeeper advice to prevent your hive from swarming by removing queen cells as you find them. Swarming splits the hive in half, which removes the honey producing worker bees in half, reducing your honey production. The new swarmed hive, now has to build out a new hive headquarters wherever they land so, they aren’t making honey initially either. Therefore, swarming is largely viewed as undesirable – a wasted effort as the bees should be focused on honey, not a new home. However, I learned a different perspective today. Some beekeepers, don’t worry about swarming. They let the hive swarm if they want to swarm. They keep swarm boxes in trees nearby and most of the time, their bees swarm to a place on their property somewhere, either in the swarm boxes or tree or other

Swarm Box – picture from Gardnerd.com.
location. After the bees swarm, the beekeeper goes and collects the swarmed hive into a new hive box. The hive effectively split itself and the beekeeper collects up the new hive and now where there was one hive, there are two. The beekeeper explaining this to me started the year with 14 hives and now he has 25, all from swarming hives. It does affect honey production but he doesn’t worry too much about it. I heard another beekeeper talking about this as his approach too. It is the approach of beekeepers that don’t want to check their hives as frequently as recommended. They let their hives do what the hives are going to do. There are many varied approaches to beekeeping and it is good to have exposure to the different ways, so that each beekeeper can land on what is right for them.
Purchased Queen Bees. Picture from apishive.com
Info on Queens: We are learning that lots of people have problems with queens, so much so, that many people in the honey business just start with a new queen each year or two. Here is a picture of a queen in a cage. This is how they arrive when you purchase one. There is a special process for introducing them into the hive, which you have to do carefully. You also leave her in the cage until you are sure the hive has accepted her.
Cloaking Method: This is a method that was developed to create new queens. Here is a blog I found that has a nice write up on this method called the Cloake Board process.
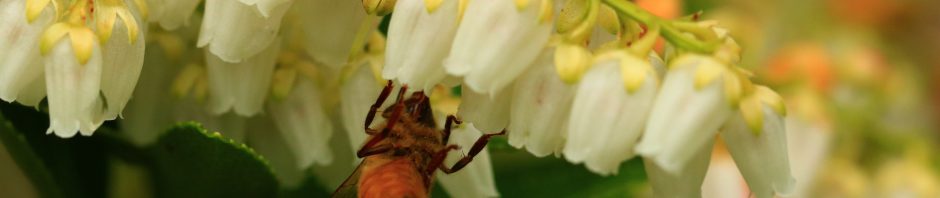
On identifying eggs in the hive: One method is to use frames with black backgrounds. Eggs are more visible on black backgrounds. Another method is to have the sun behind your back so that the sun is shining right into the cells to make the eggs easier to see. Since we don’t have frames with black backgrounds, we’ll put the sun to our backs. We will consider black background frames for the future.

Picture from annmariegianni.com
Candle Making: One of the bee club members took the group through candle making with beeswax. The process is much like any other candle making, however, the challenge is with cleaning the wax. You have to soak and drain, soak and drain, soak and drain the honey comb many times in warm to hot water to clean out the honey and dirt. You collect the wax with a kitchen strainer. After you’ve been through that process several times and

Picture and candle from thebeeshop.net.
then you put it again in warm to hot water and then squeeze out the water from the comb, making wax balls. Now it is ready to heat. You melt the wax, then pour it into a ‘cottage cheese’ type container through a straining fabric like tee shirt material or cotton muslin. Let it solidify overnight, pop it out of the container and find the rest of the debris left in the wax at the bottom of the solid wax form. You then cut off the wax with the debris and now you have clean wax for candles. Beeswax smells so sweet and good. Love it!

Result of my efforts at the picnic.
Natural Balm and Salve: Shannon Marie Svensson from Circle Green Healing Arts was there to show how easy it is to make natural lip balms and salves with beeswax and oils. Melt one part beeswax with three parts liquid oil to make the base then you can choose an essential oil to scent it as you please. The two different liquid oils that she used were olive oil (salve) and coconut oil (lip balm). We all then picked out a preferred scent to mix in and take home with us in small containers. I picked peppermint for the lip balm and lavender for the salve. I was amazed at how taking simple ingredients and with a simple process can create useful and beneficial products for our everyday use.
This was a great day filled with conversation, food and fellowship with a great group of people. Thanks to all who planned, organized, hosted, presented and attended. Loved it all!
Talk later, Sheri
